The Ultimate Guide to Web Animation with JavaScript: Techniques and Performance
From subtle micro-interactions that delight users to full-blown immersive 3D experiences, web animation has become an indispensable part of modern web development. Gone are the days of clunky Flash plugins and jittery GIFs. Today, we have a powerful suite of browser-native technologies that allow us to create smooth, performant, and interactive animations. This evolution has transformed the web from a static medium into a dynamic canvas for storytelling and user engagement.
This comprehensive guide will take you on a deep dive into the world of Web Animation. We’ll explore the foundational choices between CSS and JavaScript, master 2D graphics with the Canvas API, and venture into the exciting realm of 3D with WebGL and Three.js. Along the way, we’ll cover essential JavaScript Performance best practices, modern tooling, and provide practical code examples to solidify your understanding. Whether you’re a seasoned developer looking to refine your skills or a newcomer eager to learn, this article will equip you with the knowledge to bring your web projects to life.
The Foundations of Web Animation: CSS vs. JavaScript
The first decision every developer faces when implementing an animation is choosing the right tool. The primary choice is between declarative CSS animations and imperative JavaScript animations. Each has its strengths and is suited for different scenarios.
CSS Animations & Transitions
CSS is the ideal choice for simple, “set-it-and-forget-it” animations. These are typically state-based, like a button changing color on hover or a modal window sliding into view. The browser is highly optimized to handle CSS animations, often running them on a separate compositor thread. This means they can be incredibly smooth and performant, as they don’t block the main JavaScript thread responsible for user interactions.
- Use Cases: UI element state changes, hover effects, simple loading spinners, and menu transitions.
- Pros: Excellent performance, simple declarative syntax, easy to implement for basic effects.
- Cons: Limited interactivity and programmatic control, difficult to create complex, chained sequences.
JavaScript-driven Animation
When you need granular control, complex sequencing, or interactivity based on user input (like mouse movement or scrolling), JavaScript is the answer. Modern JavaScript Animation relies on the requestAnimationFrame() method. This API tells the browser you wish to perform an animation and requests that the browser schedule a repaint for the next animation frame. It’s far superior to older methods like setInterval() because it’s synchronized with the browser’s refresh rate, leading to smoother animations and better battery efficiency.
The Web Animations API (WAAPI)
The Web Animations API (WAAPI) offers the best of both worlds. It provides the performance benefits of CSS animations with the powerful, programmatic control of JavaScript. You can create dynamic, interactive animations, control their playback (play, pause, seek, reverse), and chain them together with precision, all through a straightforward JavaScript API.

Here’s a basic example of using the WAAPI’s .animate() method to create a keyframe animation directly in JavaScript:
// Select the element to animate
const rotatingBox = document.querySelector('.box');

// Define the keyframes, similar to CSS @keyframes
const keyframes = [
  { transform: 'rotate(0deg) scale(1)', backgroundColor: '#4a90e2' },
  { transform: 'rotate(360deg) scale(1.2)', backgroundColor: '#f5a623' }
];

// Define the animation options
const options = {
  duration: 2000, // 2 seconds
  iterations: Infinity, // Loop forever
  direction: 'alternate', // Animate back and forth
  easing: 'ease-in-out'
};

// Create and play the animation
const animation = rotatingBox.animate(keyframes, options);

// You can control the animation programmatically
// animation.pause();
// animation.play();
// animation.reverse();
Bringing 2D Worlds to Life with the Canvas API
While the DOM is excellent for documents and user interfaces, it can become a performance bottleneck when you need to animate hundreds or thousands of individual elements. This is where the HTML <canvas> element shines. The Canvas JavaScript API provides a 2D drawing surface where you can render graphics, text, and images with pixel-level control.
What is the Canvas API?
The Canvas API operates in “immediate mode,” meaning once you draw something, the canvas forgets about it. It doesn’t maintain a scene graph of objects like the DOM. To create an animation, you must manually clear and redraw the entire scene for every frame. This sounds like a lot of work, but it’s incredibly fast and efficient, making it perfect for games, data visualizations, and complex graphical editors.
The Animation Loop
The core of any canvas animation is the “animation loop,” a function that runs on every frame using requestAnimationFrame(). This loop typically follows three steps:
- Update State: Modify the properties of the objects you want to animate (e.g., change their position, velocity, or color).
- Clear Canvas: Wipe the entire canvas clean to prepare for the new frame.
- Draw Scene: Redraw all objects in their new positions.
Here is a practical example of a simple bouncing ball animation using the 2D canvas context. This demonstrates the fundamental animation loop pattern in Modern JavaScript.
const canvas = document.getElementById('myCanvas');
const ctx = canvas.getContext('2d');
// Set canvas dimensions
canvas.width = 600;
canvas.height = 400;
// Ball object using JavaScript Objects syntax
const ball = {
x: 100,
y: 100,
vx: 5, // Velocity x
vy: 2, // Velocity y
radius: 25,
color: '#e94560'
};
function draw() {
// 1. Clear the canvas
ctx.clearRect(0, 0, canvas.width, canvas.height);
// 2. Draw the ball
ctx.beginPath();
ctx.arc(ball.x, ball.y, ball.radius, 0, Math.PI * 2, true);
ctx.closePath();
ctx.fillStyle = ball.color;
ctx.fill();
}
function update() {
// Move the ball
ball.x += ball.vx;
ball.y += ball.vy;
// Wall collision detection
if (ball.y + ball.vy > canvas.height - ball.radius || ball.y + ball.vy < ball.radius) {
ball.vy = -ball.vy;
}
if (ball.x + ball.vx > canvas.width - ball.radius || ball.x + ball.vx < ball.radius) {
ball.vx = -ball.vx;
}
}
function animationLoop() {
update();
draw();
// Request the next frame
requestAnimationFrame(animationLoop);
}
// Start the animation
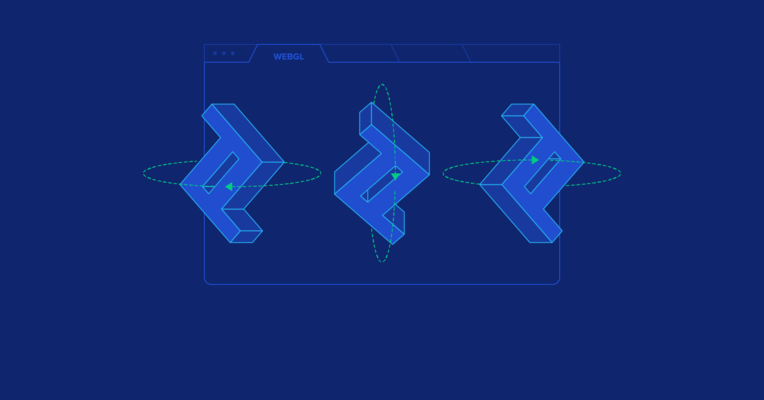
animationLoop();Entering the Third Dimension: WebGL and Three.js
For truly immersive experiences, we need to move beyond two dimensions. WebGL (Web Graphics Library) is a low-level JavaScript API that allows for GPU-accelerated 3D (and 2D) graphics rendering directly in the browser, without plugins. It brings the power of OpenGL ES to the web.
Understanding WebGL
Directly using the WebGL API is incredibly powerful but also notoriously complex. It requires a deep understanding of computer graphics concepts like shaders (code that runs on the GPU), vector math, matrices, and buffer management. For this reason, most developers opt to use a higher-level library that abstracts away this complexity.
Introducing Three.js
Three.js is the most popular and mature library for creating 3D graphics on the web. It provides a simple, intuitive API that handles the WebGL boilerplate, allowing you to focus on creating your scene. The core components of a Three.js application are:
- Scene: The container for all your 3D objects, lights, and cameras.
- Camera: Defines the viewpoint from which the scene is rendered.
- Renderer: Does the magic of drawing the scene from the camera’s perspective onto a
<canvas>element. - Mesh: An object in your scene, which consists of a Geometry (the shape, like a cube or sphere) and a Material (the appearance, like color or texture).
- Lights: Illuminate the scene, allowing materials to reflect light and cast shadows.
Below is a complete example of setting up a basic Three.js scene with a rotating cube. This code uses modern ES Modules, which is the standard for structuring Full Stack JavaScript applications today.
import * as THREE from 'three';

// 1. Scene
const scene = new THREE.Scene();
scene.background = new THREE.Color(0x222222);

// 2. Camera
const camera = new THREE.PerspectiveCamera(75, window.innerWidth / window.innerHeight, 0.1, 1000);
camera.position.z = 5;

// 3. Renderer
const renderer = new THREE.WebGLRenderer();
renderer.setSize(window.innerWidth, window.innerHeight);
document.body.appendChild(renderer.domElement);

// 4. Geometry and Material to create a Mesh
const geometry = new THREE.BoxGeometry(1, 1, 1);
const material = new THREE.MeshStandardMaterial({ color: 0x00ff00 });
const cube = new THREE.Mesh(geometry, material);
scene.add(cube);

// 5. Lights
const ambientLight = new THREE.AmbientLight(0xffffff, 0.5);
scene.add(ambientLight);
const pointLight = new THREE.PointLight(0xffffff, 0.8);
pointLight.position.set(5, 5, 5);
scene.add(pointLight);

// Animation Loop
function animate() {
  requestAnimationFrame(animate);

  // Animate the cube
  cube.rotation.x += 0.01;
  cube.rotation.y += 0.01;

  // Render the scene
  renderer.render(scene, camera);
}

// Handle window resizing
window.addEventListener('resize', () => {
  camera.aspect = window.innerWidth / window.innerHeight;
  camera.updateProjectionMatrix();
  renderer.setSize(window.innerWidth, window.innerHeight);
});

// Start the animation
animate();
Performance, Best Practices, and Modern Tooling
Creating beautiful animations is only half the battle; they must also be performant to ensure a smooth user experience. A janky animation can be worse than no animation at all. Here are some critical best practices for JavaScript Optimization.
Animation Performance Best Practices
- Animate Compositor-Only Properties: Whenever possible, limit your CSS and WAAPI animations to the
transformandopacityproperties. Browsers can optimize these by handing them off to the GPU’s compositor thread, freeing up the main thread and preventing jank. Animating properties likewidth,height, ormargincan trigger expensive layout recalculations and repaints. - Embrace
requestAnimationFrame(): As discussed, always userAF()for JavaScript animations to sync with the browser’s refresh cycle. - Offload Heavy Calculations with Web Workers: For complex, long-running calculations (like physics simulations or AI in a game), use Web Workers. They run JavaScript in a background thread, preventing the main UI thread from freezing.
- Throttle and Debounce Events: For animations tied to high-frequency events like
scrollormousemove, use throttling or debouncing to limit how often your animation code runs, preventing performance bottlenecks.
Essential Libraries and Tools
While the native APIs are powerful, the web animation ecosystem is rich with tools that can significantly boost your productivity.
- GSAP (GreenSock Animation Platform): GSAP is the industry-standard JavaScript library for professional-grade animation. It offers unparalleled performance, solves countless browser inconsistencies, and features a powerful timeline for sequencing complex animations with ease.
- JavaScript Bundlers: Modern web development relies on tools like Vite and Webpack. These JavaScript Bundlers process your code, handle ES Modules, optimize assets like images and 3D models, and package everything for efficient delivery to the browser. They are essential for managing dependencies in complex projects, especially when using libraries like Three.js.
Conclusion: The Future of Animation on the Web
We’ve journeyed from the simple elegance of CSS transitions to the immersive depths of 3D with Three.js. The key takeaway is to choose the right technology for the task at hand. For simple UI states, CSS is your best friend. For interactive 2D graphics, the Canvas API offers unparalleled performance. For complex, timeline-based animations, a library like GSAP is invaluable. And for pushing the boundaries of what’s possible in a browser, WebGL and Three.js open up a new dimension of creativity.
As you continue your journey, always prioritize performance. Use hardware-accelerated properties, leverage requestAnimationFrame(), and understand the tools at your disposal. The web animation landscape is constantly evolving, with emerging technologies like WebGPU promising even greater performance and capabilities. The best next step is to start building. Pick a concept, whether it’s a simple animated icon or a basic 3D product viewer, and bring it to life. The web is your canvas—go create something amazing.