Beyond `npm install`: A Deep Dive into Modern JavaScript Dependency Management
The Unseen Foundation of Modern JavaScript
In the world of modern web development, it’s nearly impossible to build a significant application from scratch. We stand on the shoulders of giants, leveraging a vast ecosystem of open-source libraries and frameworks to accelerate development, ensure reliability, and implement complex features. At the heart of this collaborative ecosystem lies the Node Package Manager, or NPM. It’s the silent workhorse that powers nearly every JavaScript project, from simple static sites built with Vite to complex full-stack applications running on Node.js and Express.js.
However, the way we manage these third-party dependencies is evolving. The traditional approach of simply running npm install and treating packages as immutable black boxes is being challenged by a new philosophy—one that emphasizes ownership, customization, and control. This article will take you on a deep dive into NPM, exploring its core mechanics and the traditional workflow. We will then venture beyond, examining alternative strategies for dependency management that give developers unprecedented control over their codebase. By understanding the full spectrum of options, you can make more informed, strategic decisions for your next JavaScript project.
Section 1: The Core of NPM: `package.json` and the Dependency Graph
Before we can explore advanced strategies, we must first master the fundamentals. NPM is more than just a command-line tool; it’s a massive public registry of JavaScript packages and a set of rules that govern how they interact. The central nervous system of any NPM-managed project is a single file: package.json.
The Anatomy of `package.json`
This JSON file serves as the manifest for your project. It contains crucial metadata, defines project dependencies, and configures helpful scripts for automation. Understanding its key fields is the first step to mastering NPM.
name&version: Uniquely identifies your package, following the Semantic Versioning (SemVer)MAJOR.MINOR.PATCHstandard.description&author: Provides human-readable context about the project.main: The primary entry point of your application (e.g.,index.js).scripts: A powerful feature to define command-line shortcuts for tasks like starting a server, running tests, or bundling assets.dependencies: A list of packages required for the application to run in production (e.g., React, Express.js).devDependencies: A list of packages needed only for development and testing (e.g., Jest, Webpack, TypeScript). These are not included in a production build.
A well-structured package.json might look like this:
{
  "name": "modern-js-app",
  "version": "1.0.0",
  "description": "A comprehensive example of a modern JavaScript application.",
  "main": "server.js",
  "scripts": {
    "start": "node server.js",
    "dev": "nodemon server.js",
    "test": "jest",
    "build": "webpack --mode production"
  },
  "dependencies": {
    "express": "^4.18.2",
    "react": "^18.2.0"
  },
  "devDependencies": {
    "@babel/core": "^7.21.4",
    "jest": "^29.5.0",
    "nodemon": "^2.0.22",
    "webpack": "^5.80.0",
    "webpack-cli": "^5.0.2"
  },
  "author": "Your Name",
  "license": "MIT"
}
Understanding Semantic Versioning (SemVer)
The symbols next to the version numbers (^ and ~) are crucial. They instruct NPM on how to handle updates.
- Caret (
^): Allows updates to the MINOR and PATCH versions.^4.18.2will match any version from4.18.2up to, but not including,5.0.0. This is the default and is generally safe, as minor versions shouldn’t introduce breaking changes. - Tilde (
~): Allows updates to the PATCH version only.~4.18.2will match any version from4.18.2up to, but not including,4.19.0. This is more restrictive and used when you are less confident about a library’s backward compatibility.
This system is designed to let you receive bug fixes and non-breaking features automatically, but it’s also the source of potential “breaking changes” if a package doesn’t strictly adhere to SemVer.
Section 2: The NPM Workflow in Practice

JavaScript dependency graph – UML dependency is directed, supplier-client relationship which …
With a solid package.json, the NPM CLI becomes your primary tool for managing the project’s lifecycle. From initialization to deployment, a few key commands orchestrate the entire process.
Installation, `node_modules`, and `package-lock.json`
When you run npm install, NPM performs several critical actions:
- It reads your
package.jsonfile. - It resolves the entire dependency tree, including the dependencies of your dependencies, and so on.
- It downloads all these packages from the NPM registry and places them in a folder called
node_modules. - It creates or updates a file called
package-lock.json.
The package-lock.json file is paramount for creating reliable, reproducible builds. It records the exact version of every single package that was installed, freezing the dependency tree at a specific point in time. This ensures that every developer on your team, as well as your CI/CD pipeline, installs the exact same versions, preventing “it works on my machine” issues.
Here is a typical command sequence for starting a new Node.js project:
# 1. Create a new directory for the project
mkdir my-express-server
cd my-express-server

# 2. Initialize a new NPM project, creating package.json
npm init -y

# 3. Install Express.js as a production dependency
npm install express

# 4. Install Nodemon as a development dependency
npm install --save-dev nodemon

# At this point, you will have node_modules, package.json, and package-lock.json
Automating Tasks with NPM Scripts
The scripts section of package.json is a powerful automation tool. It allows you to define simple aliases for much more complex commands, creating a consistent interface for interacting with your project.
"scripts": {
  "start": "node src/index.js",
  "dev": "vite",
  "build": "vite build",
  "test": "jest --watchAll",
  "lint": "eslint 'src/**/*.js'",
  "lint:fix": "eslint 'src/**/*.js' --fix"
}
With this configuration, you can simply run npm run dev to start your Vite development server or npm test to run your Jest test suite. This abstracts away the underlying tooling, making the project easier to work with for everyone on the team.
Section 3: Beyond the Black Box: The “Vendor-In” Strategy
The traditional NPM workflow is powerful, but it has its trade-offs. The node_modules directory is often treated as a “black box”—a vast collection of third-party code that you don’t directly control. This can lead to several challenges:
- Unexpected Breaking Changes: A sub-dependency you weren’t even aware of could release a new version that breaks your application.
- Code Bloat: You might install a large library like
lodashjust to use one or two functions, but the entire package is added to your dependencies. - Lack of Customization: Modifying the behavior or style of a third-party component can be difficult, often requiring awkward overrides or forking the entire library.
- Security Risks: Every dependency is a potential attack vector. The more packages you have, the larger your surface area for vulnerabilities.
A Different Philosophy: Owning Your Code
An alternative approach, gaining traction particularly for UI components, is to bypass NPM for certain assets and instead copy the code directly into your project. This is sometimes called “vendoring” or the “vendor-in” approach.
The benefits are the inverse of the problems above:
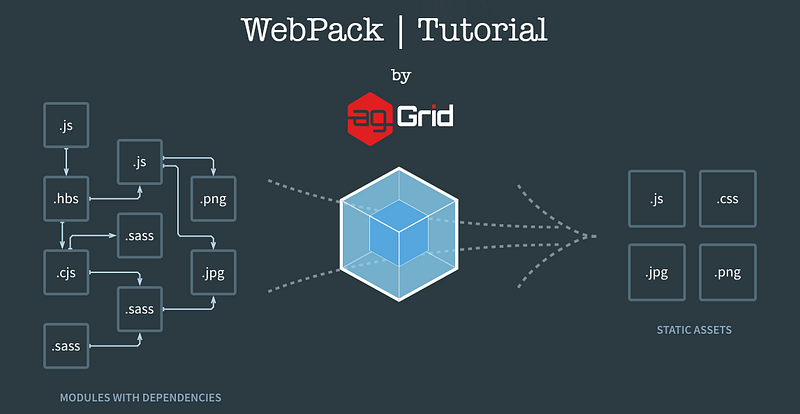
JavaScript dependency graph – Webpack Tutorial: Understanding How it Works
- 100% Ownership: The code lives in your source tree (e.g., in
/src/components). It’s your code now. You can modify it, style it, and refactor it as you see fit. - No Breaking Changes: Since the code is part of your project, it will never change unless you change it. You are completely insulated from upstream updates.
- Full Customization Freedom: You have direct access to the source. Need to change the animation timing on a dropdown menu? Just edit the component’s code.
- No Black Box: The code is transparent, reviewable, and can be covered by your own test suite.
A Practical Example: A Customizable React Component
Imagine you need a modal dialog. Instead of installing a package like react-modal, you could find a well-written, self-contained modal component and simply place its code in your project. Some modern UI libraries and design systems are now being built around this very concept, providing CLI tools that copy component code directly into your project rather than adding a dependency.
You would add a file like this directly to your project, for example at src/components/ui/Modal.jsx:
// src/components/ui/Modal.jsx
import React from 'react';
import './Modal.css'; // You also own and can customize the CSS
const Modal = ({ isOpen, onClose, children }) => {
if (!isOpen) {
return null;
}
// You can now freely modify the JSX, add new props, or change the styling
return (
<div className="modal-overlay" onClick={onClose}>
<div className="modal-content" onClick={(e) => e.stopPropagation()}>
<button className="modal-close-button" onClick={onClose}>
×
</button>
{children}
</div>
</div>
);
};
export default Modal;This approach isn’t a silver bullet. It’s best suited for self-contained assets like UI components, utility functions, or configuration files. For large, complex dependencies with their own ecosystems (like React, Vue.js, or Express.js), the traditional NPM approach remains superior. The key is to choose the right strategy for the right situation.
Section 4: The Modern Ecosystem and Best Practices
The JavaScript world moves fast. While NPM is the standard, it’s not the only player. Understanding the modern landscape and adhering to best practices is crucial for maintaining healthy, secure, and performant applications.
Alternative Package Managers: Yarn and pnpm

JavaScript dependency graph – Webpack Tutorial: Understanding How it Works
Competition has led to innovation in package management. Two major alternatives to NPM have emerged, each with its own strengths:
- Yarn: Created by Facebook, it initially offered significant performance and reliability improvements over NPM. Today, the differences are smaller, but Yarn is still known for its excellent support for “workspaces” in monorepos.
- pnpm: This manager’s primary advantage is efficiency. It uses a content-addressable store to avoid duplicating packages on disk. If multiple projects use the same version of a dependency, pnpm stores it only once. It also creates a non-flat
node_modulesstructure that prevents “phantom dependencies”—where you can access packages you haven’t explicitly listed inpackage.json.
The basic commands are often very similar across all three tools:
# Install all dependencies
npm install
yarn install
pnpm install

# Add a new dependency
npm install lodash
yarn add lodash
pnpm add lodash

# Run a script
npm run dev
yarn dev
pnpm dev
Security and Performance Best Practices
Regardless of your chosen tool or dependency strategy, follow these universal best practices:
- Always Commit Your Lock File:
package-lock.json,yarn.lock, orpnpm-lock.yamlshould always be committed to your version control system. This is the key to reproducible builds. - Audit Your Dependencies: Regularly run
npm audit(or its equivalent) to check for known security vulnerabilities in your dependency tree and apply patches as needed. - Prune Unused Packages: Use tools like
depcheckto identify and remove dependencies that are no longer being used in your project. - Leverage Tree-Shaking: Use modern JavaScript Bundlers like Webpack or Vite. Their tree-shaking capabilities analyze your code and eliminate unused exports from your dependencies, resulting in a smaller, more performant production bundle.
- Be Mindful of What You Add: Before adding a new dependency, consider its size, its number of sub-dependencies, and its maintenance history. Sometimes, a simple, self-written function is better than a large library.
Conclusion: A Deliberate Approach to Dependencies
NPM is the bedrock of the JavaScript ecosystem, and mastering its workflow is a fundamental skill for any developer. The traditional model of installing packages from a central registry provides immense leverage and allows us to build powerful applications quickly. However, it is not the only way.
The emerging philosophy of “owning your code” by vendoring in specific components offers a compelling alternative that prioritizes control, stability, and customization over the convenience of automated updates. The truly modern JavaScript developer understands both approaches and knows when to apply each one. The next time you reach for a new library, take a moment to think strategically. Should this be a managed, external dependency, or is it an opportunity to own a piece of your codebase completely? Making that choice deliberately is the hallmark of a mature and effective engineer.